中文
ENGLISH
中文
ENGLISH
One important element to keep consistent is the bend radius. Pick up any bent metal bracket or mount and look at the inside corners—see that little radius there? It’s created by a punch and die set on a press brake. Ideal Gruop can make bend radii all the way up to 1 in., but the standard tool set creates a 0.030 in. internal corner, so try to stick with this for the lowest cost. As for the external corners, these are largely a factor of the material, its thickness, and the internal bend radii used.

Also, keep in mind that metal resists bending. To prevent cracks and meet a +/- 1-degree bend tolerance, Protolabs will place bend reliefs in strategic part locations—with a box shape, for example, the corners will be relieved slightly to allow the flanges to meet properly. The total amount of bend relief in this case will not exceed the bend radius plus the material thickness, and be no wider than 0.030 in.
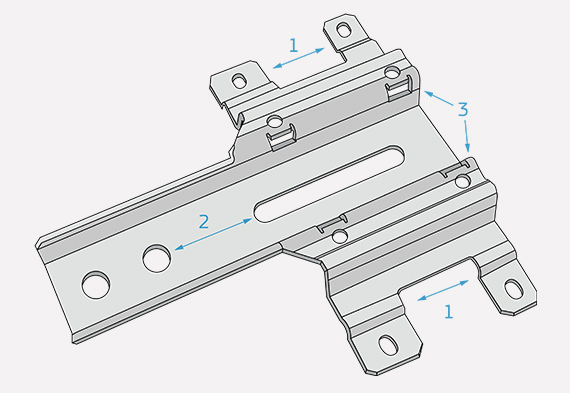
Offsets are Z-shaped bends that might be used on brackets and clamps—the clips that hold your window screens in place are a good example. The same rules apply here as with any other bent part—try to keep all the bend radii the same, with 0.030 in. the preferred radius. Also, the parallel planes should be at least two times the material thickness apart, and you can expect Protolabs to maintain a tolerance of +/- 0.012 in. between the two features.
Bend a flange all the way over and you have a hem. They are used to strengthen part edges. An open hem is one that forms a U or C-shape and might be used to accept a pin for a hinge. Closed hems are basically flat, with the material folded over completely on itself. The inside diameter of an open hem should be equal to or greater than the material thickness, and the “return length” in either case should be at least four times that.

These should be placed at least 1/16 of an inch from the nearest wall or part edge for materials 0.036-in. thick or less, and 1/8-in. or more from the edge on everything else. Hole and width tolerances will be +/- 0.005 in. unless otherwise specified. Check with the manufacturer if an insert will be used, as additional clearance may be required. If using the eRAPID SOLIDWORKS plugin, all holes and slots should be a minimum of four times the material thickness from any part edge or feature.
Sheet metal parts often require notches to accommodate a screw or other fastener. These should be one material thick or wider and extend no more than five times the slot width into the workpiece. Similarly, the tabs on either side of a notched feature should be at least 0.126 in. or two times the material thickness across (whichever is greater) and again, be a maximum of five times the part thickness in length.


